

USB UART Driver Fix: The Ultimate Install & Setup Guide
You plug in a new Arduino clone, ESP32 board, router console cable, or USB serial adapter and expect a friendly new port to appear. Instead, Windows says “USB Device,” macOS stays quiet, or Linux sees something but not what you need. That moment is common, and it usually doesn’t mean the board is dead.
Most of the time, the gap is simple. Your computer speaks USB. Your target hardware often speaks UART. A tiny bridge chip in the middle has to translate between them, and the USB UART driver is what lets the operating system understand that translator.
Some devices work immediately because they present themselves as a standard USB class. Others need a chipset-specific driver before they’ll show up as a COM port or serial device. If you’ve got an FTDI, CP210x, or CH340 based device, the fix is usually straightforward once you know which chip is on the board and what the operating system expects.
Why Your USB Device Is Invisible to Your Computer
The reason this problem exists goes back to how PCs changed. USB was introduced in 1996 to replace a messy mix of older connections such as serial ports, parallel ports, and proprietary cables, as explained in Total Phase’s overview of UART and USB. That cleanup was good for users overall, but it also created a permanent need for bridge hardware whenever a modern computer has to talk to a simpler serial interface on embedded gear.
A USB-to-UART bridge does exactly that. On the computer side, it looks like a USB device. On the hardware side, it exposes UART pins such as TX and RX. The driver sits between the operating system and that bridge chip so the machine can create a usable serial port.
What’s usually happening behind the scenes
If your board seems invisible, one of these is usually true:
- The board uses a driver-free USB class: Some devices enumerate as USB CDC ACM, so the operating system already knows how to treat them as a serial interface.
- The board uses a vendor-specific bridge: That’s common with FTDI, Silicon Labs CP210x, and many CH340 based boards. In those cases, the OS may need a matching driver before it creates a COM port or tty device.
- The device is detected, but not in the way you expect: It might appear as a generic USB device rather than a serial port, which points to how the bridge identifies itself over USB, not to a bad UART.
Practical rule: If the cable powers the board but no serial port appears, suspect identification and driver class first. Suspect hardware failure later.
Why this confuses so many people
A lot of hobby boards look the same from the outside. Two nearly identical boards can behave very differently when plugged in. One might use native USB and work instantly. Another might hide a CH340 or CP2102 that needs OS help before anything useful appears.
That’s why a working power LED doesn’t prove the serial side is ready. USB power and USB enumeration are separate steps. Your gadget can be fully powered while the operating system still has no idea what driver to load.
Identifying Your USB UART Chipset
Before installing anything, identify the bridge chip. Guessing wastes time and often leaves old drivers piled onto the system without solving the underlying issue. With FTDI, CP210x, and CH340 devices, a few minutes of detective work usually tells you exactly what to install, or whether you need any driver at all.
Start with the board itself
On open development boards, the quickest method is visual inspection. Look near the USB connector for a small chip marked with something like FT232R, CP2102, CP2104, or CH340G. Some boards print the part number directly on the silkscreen. Others don’t, so you may need a flashlight or magnifier.
Common patterns you’ll see:
- FTDI family: Labels often include FT232 variants.
- CP210x family: Silicon Labs parts often start with CP210.
- CH340 family: WCH parts usually show CH340.
If the device is inside an enclosure, skip the screwdriver for now and ask the operating system what it sees.
Check what the OS sees
The modern point of confusion is that not every USB serial device behaves the same way. Some enumerate as USB CDC ACM and work with built-in support, while others require a vendor package such as FTDI or Silicon Labs. Microsoft’s discussion of devices that appear as a generic USB device instead of a COM port highlights that exact split between driver-free and driver-required behavior on current Windows systems in this Windows Answers thread about USB-to-UART cables and COM ports.
Use these checks:
- Windows: Open Device Manager. Look under “Ports (COM & LPT)” and also under “Universal Serial Bus controllers” or “Other devices.”
- macOS: Open System Information and inspect the USB tree for the connected device.
- Linux: Run
lsusband note the vendor and product identifiers.
If the device shows up as a USB device but no serial port appears, that usually means the computer can see the hardware but doesn’t yet know which serial driver to bind.
Match the digital fingerprint
The most reliable clue is the VID/PID pair. That’s the vendor ID and product ID the device reports over USB. Think of it as the hardware’s fingerprint.
| Chipset Family | Manufacturer | Common Vendor ID (VID) | Common Product ID (PID) |
|---|---|---|---|
| FTDI | FTDI | Varies by device | Varies by device |
| CP210x | Silicon Labs | Varies by device | Varies by device |
| CH340 | WCH | Varies by device | Varies by device |
This table is intentionally conservative. Different boards, revisions, and clones can present different identifiers, and the provided source material does not verify specific VID/PID values. Use the OS-reported IDs and compare them with the manufacturer’s documentation for your exact adapter or board.
A simple decision shortcut
If you’re stuck, use this order:
- Read the chip marking
- Check the OS device listing
- Confirm whether it presents as CDC ACM or a vendor-specific bridge
- Install only the driver that matches that result
That sequence fixes more setups than random driver hunting ever will.
Downloading and Installing the Right Driver
Knowing the chip family saves time here, but there is one modern wrinkle that trips people up. Some boards need a vendor driver. Others present themselves as standard USB CDC serial devices and work with the operating system’s built-in support. If you skip that distinction and start installing random packages, you can turn a simple setup into an hour of guesswork.
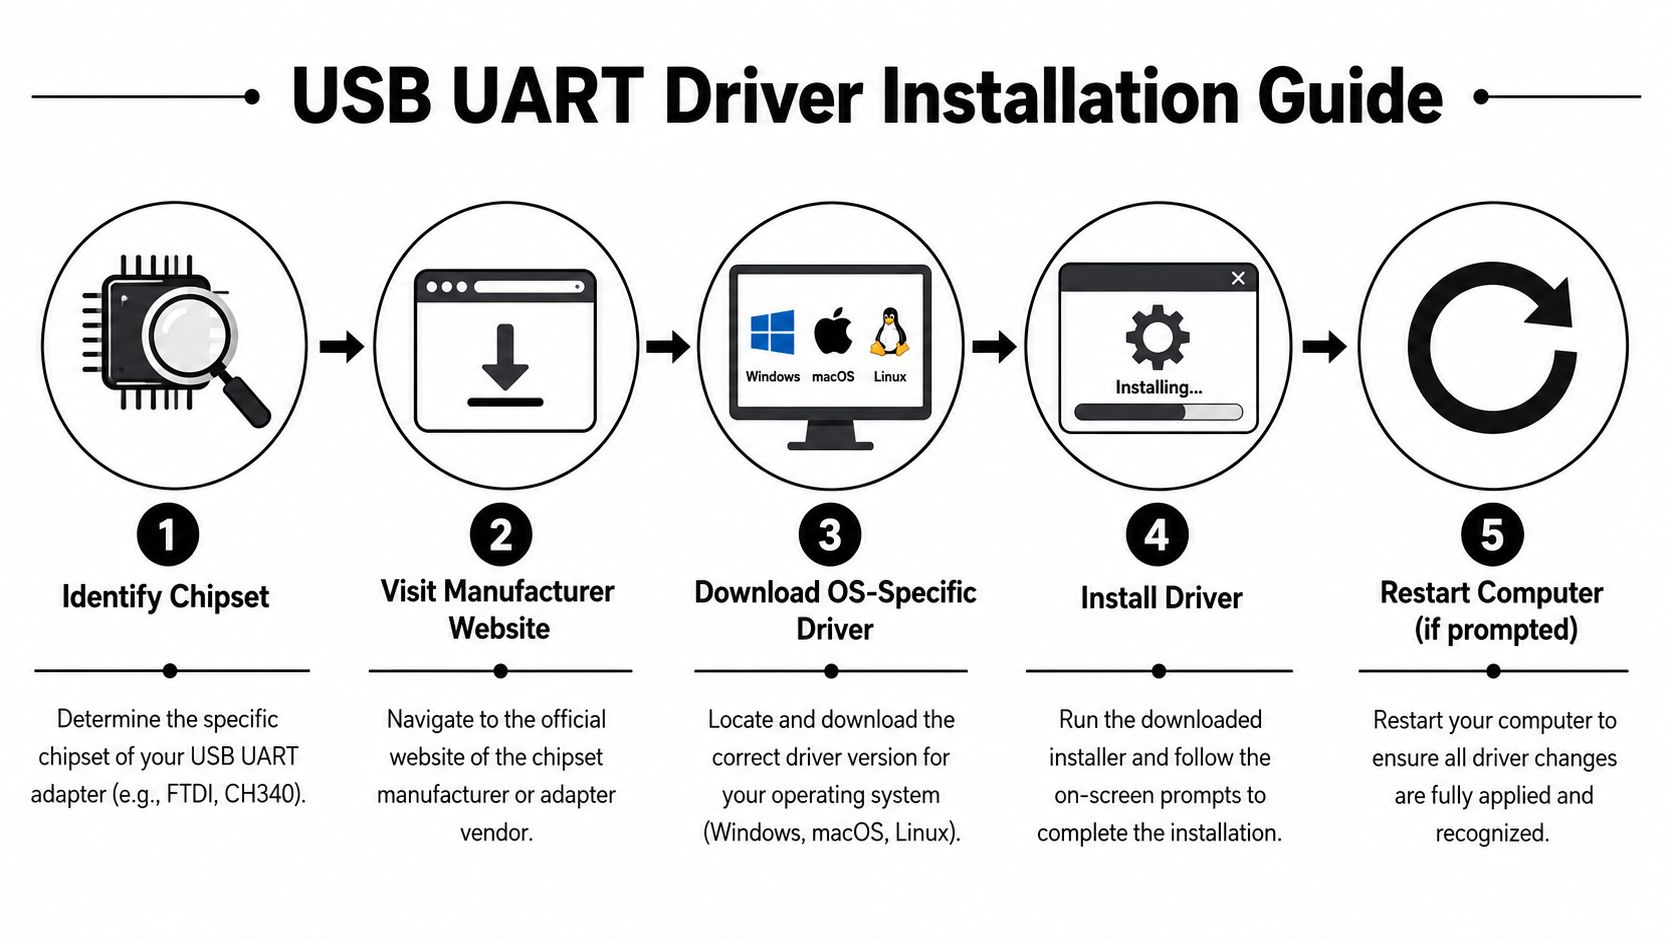
The rule I use is simple. Start with the board vendor or the chip maker. Avoid third-party driver sites unless you have no other path and can verify the files. Bad packages are still common, especially for cheap adapters sold under many names.
Windows
Windows is the platform where the difference between driver-required and driver-free devices shows up fastest. A USB CDC device may appear as a COM port with no manual work. FTDI, CP210x, and CH340 adapters often install through Windows Update, but that depends on the hardware ID, the driver catalog available on the machine, and company policy if the PC is managed.
A practical install sequence looks like this:
- Plug the adapter in once and wait a moment.
- Open Device Manager.
- Check whether it appears under Ports (COM & LPT), Universal Serial Bus controllers, or Other devices.
- If no serial port appears, install the package that matches the identified chipset or the board vendor’s package for that exact product.
- Unplug and reconnect the device.
- Confirm that a COM port now appears.
If Windows throws a signature warning, stop and verify the download source before you continue. If the device is on a work laptop, group policy can block otherwise valid drivers. In that case, the fix may be administrative approval rather than a different installer.
macOS
macOS can be easy or irritating, depending on the adapter and the OS version. USB CDC devices often work without extra software. Vendor-specific bridges may still need a driver, and older packages can clash with newer macOS security rules.
Use this order:
- Install only the driver that matches the detected chip.
- Reconnect the adapter after installation.
- Check System Settings for any security approval prompt related to system software.
- Open your IDE or terminal app and confirm a serial device appears.
A common failure mode is a driver that installs cleanly but never loads because macOS is waiting for approval. The installer says success. The port list stays empty. That usually points to a blocked extension, not a bad cable.
Linux
Linux often has the least driver drama because support for many USB serial bridges is already in the kernel. That helps with FTDI and CP210x devices, and many CH340-based boards also work out of the box on current distributions. Even so, built-in support does not guarantee a usable port. You still need the kernel to bind the right driver and create the device node.
Check three things:
lsusbshows the devicedmesgshows the driver attaching/dev/ttyUSB*or/dev/ttyACM*appears after plug-in
That last detail matters. Many people expect every board to show up as ttyUSB. USB CDC devices commonly appear as ttyACM instead.
Which family usually needs what
These are the three bridge chips you will run into most often, and they each have their own pattern:
- FTDI: Usually straightforward. Support is mature across major operating systems.
- CP210x: Common on embedded boards and generally reliable once the correct package is in place.
- CH340: Very common on low-cost boards and clones. It often works fine, but it is also the family that sends people searching for drivers most often after Windows shows an unknown device or no port at all.
That is why a universal approach works better than a chipset-only guide. First decide whether the device is USB CDC or a vendor-specific bridge. Then install one matching package, reconnect the device, and check for the port. Installing FTDI, CP210x, and CH340 drivers all at once rarely helps and can make support harder later.
If you ship hardware to customers or teammates, this choice affects support load. A board that uses USB CDC usually causes less friction on locked-down machines than one that depends on a separate vendor installer. If you are packaging tools or support files with physical media, some suppliers also offer custom USB hardware, such as custom-printed USBs from Atlanta Disc, which can matter when building a release kit.
Verifying the Connection with a Serial Terminal
A driver install is only half the job. The real test is whether your computer exposes a usable serial port and whether data can make a round trip through it.
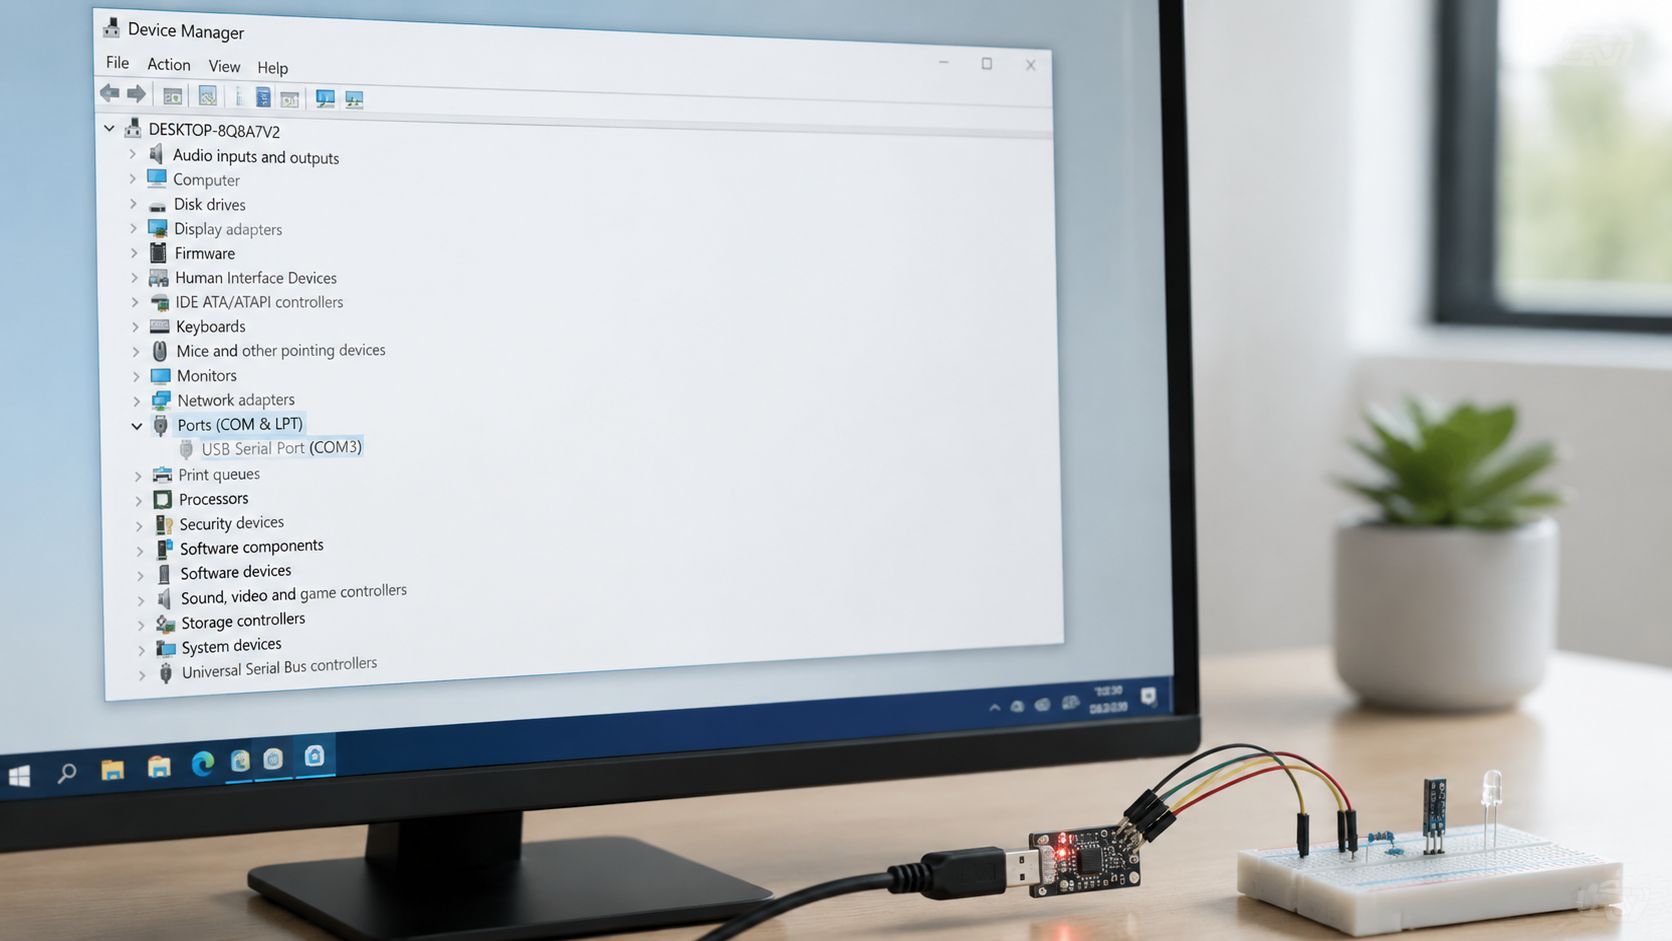
Start with the port itself. On Windows, check Device Manager for a COM port. On Linux, look for a device such as /dev/ttyUSB0 or /dev/ttyACM0. On macOS, you will usually see a /dev/tty.* device. If the port never appears, the terminal program is not the problem. Go back and fix detection first.
That ttyUSB versus ttyACM split matters here too. FTDI, CP210x, and CH340 adapters often show up as ttyUSB* on Linux, while boards that use native USB CDC often appear as ttyACM*. If you only check for one naming pattern, it is easy to miss a working device.
Run a loopback test
A loopback test is the fastest way to separate driver problems from board problems. It tests the adapter, the cable path, and the host OS without depending on the target hardware to boot correctly.
Use a serial terminal such as PuTTY, CoolTerm, or Minicom:
- Open the serial port your system created.
- Set a known baud rate such as the default used by your board or tool.
- Disconnect the adapter from the target device.
- Temporarily connect TX to RX on the USB-to-UART adapter.
- Type a few characters in the terminal.
If the characters echo back immediately, the USB side is working. The driver loaded, the port opens, and the adapter can transmit and receive.
If loopback fails, keep the test simple. Try another USB cable, another port on the computer, and another terminal app before changing drivers again. Reinstalling random driver packages usually wastes time.
Quick diagnosis: A passing loopback test points away from the driver. The remaining fault is usually target power, wiring, pinout, or serial settings.
Check the settings that cause false failures
A lot of “dead serial port” reports come down to setup mistakes rather than bad drivers.
- Wrong port selected: USB serial devices can move from COM4 to COM5 after reconnecting, and Linux device numbers can change too.
- Flow control enabled: Many UART headers only use TX, RX, and GND. If RTS/CTS hardware flow control is turned on, the session may open but never pass data.
- Port already in use: An IDE, flashing tool, or background monitor may still have the port open.
- TX and RX wired straight through: Adapter TX goes to target RX. Adapter RX goes to target TX.
- Missing ground: TX and RX alone are not enough. The adapter and target need a shared ground reference.
I see flow control trip people up more often than they expect, especially in Minicom and older terminal setups. If the port opens cleanly but nothing echoes and nothing reaches the board, set flow control to None and test again.
If you want a visual walkthrough of the basic process, this short demo is useful:
What success looks like
A good result is boring. The port appears every time you reconnect the adapter, the terminal opens without errors, and a loopback test echoes every character you type.
At that point, the USB-to-UART link is proven. If the actual board still stays silent, focus on the board side: voltage level mismatch, swapped pins, reset state, boot mode, or the wrong baud rate.
Troubleshooting Common USB UART Driver Errors
When a setup fails, the fastest path is to treat it like a symptom tree. Don’t change five things at once. Match the visible symptom to the likely cause, then apply one fix.
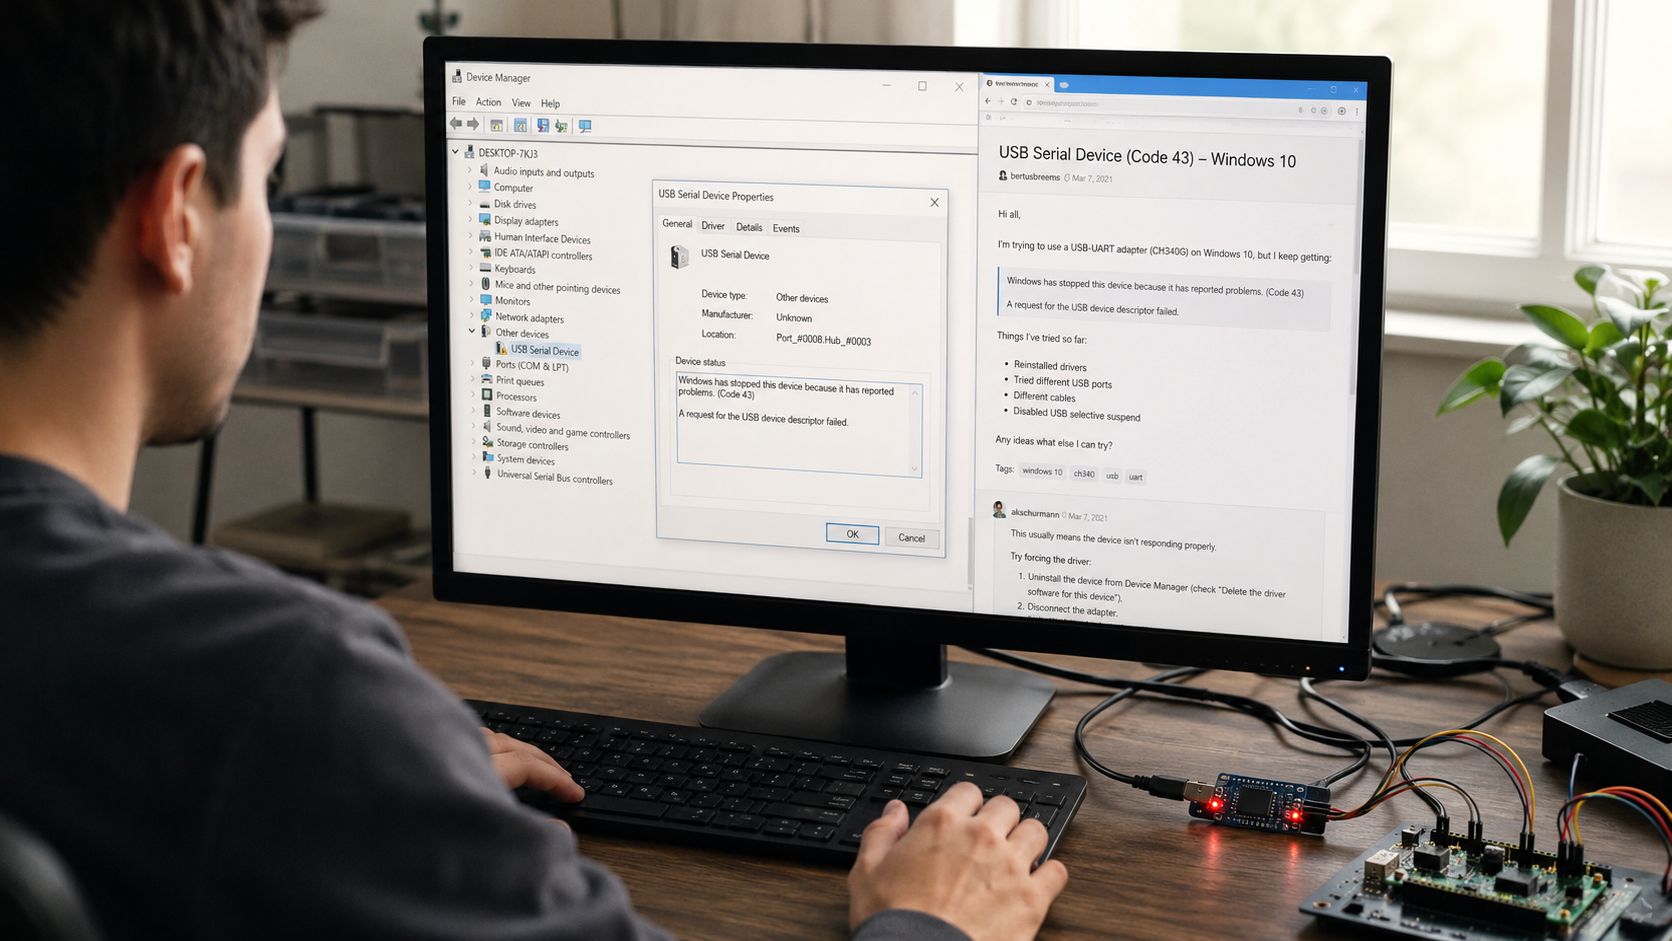
Unknown device or yellow warning icon
This usually means the computer can see that something was plugged in, but it didn’t bind the right driver.
| Symptom | Likely cause | What usually fixes it |
|---|---|---|
| Unknown Device in Windows | Missing or wrong chipset driver | Identify the chip again and install the matching vendor package |
| Generic USB entry, no COM port | Device class not recognized as serial on that system | Check whether it’s CDC ACM or a vendor-specific bridge |
| Device appears briefly, then disappears | Cable, connector, or power issue | Try another cable and another USB port |
A charge-only USB cable is still one of the dumbest and most common causes. If the board powers on but never enumerates properly, swap the cable before you do anything more advanced.
COM port exists but nothing comes through
People often blame the driver too quickly. If the port opens but no data arrives, the problem is often outside the driver.
Check these in order:
- Port selection: Confirm your terminal is attached to the port created by the adapter you just plugged in.
- Baud rate: Match the target device’s expected serial speed.
- TX/RX wiring: Cross them correctly.
- Ground: UART needs a shared ground.
- Flow control: Turn off RTS/CTS unless you know the hardware uses it.
A visible port plus a failed loopback test points to the adapter path. A visible port plus a successful loopback test points to wiring or target settings.
Garbled text or random resets
If text appears but looks corrupted, the first suspect is mismatched serial settings. The second is electrical reality. Long jumper wires, noisy benches, weak USB ports, and poor adapters all make serial links flaky.
Typical fixes:
- Lower the baud rate for initial testing
- Shorten the wiring
- Use a better cable
- Avoid dangling dupont leads for sustained transfers
- Confirm the target voltage levels match the adapter
A lot of tutorials treat UART as if it’s immune to signal quality issues. It isn’t.
Permission denied on macOS or Linux
If the device exists but your terminal app can’t open it, permissions may be the problem. On Linux, users often need to be in the correct group for serial device access. On macOS, security approval for the driver may still be incomplete.
The practical move is to test whether the port exists first, then solve permissions separately. Don’t confuse “I can see the device node” with “my user account can open it.”
The fix that solves more problems than people expect
Rebooting sounds simplistic, but after a driver install or removal, it often clears stale device bindings and old port assignments. If you changed drivers, removed one package, or approved a new extension, reconnect after a restart before declaring failure.
Pro Tips for Developers and Power Users
The easy part is getting a COM port to appear. The harder part is figuring out whether your adapter, your driver stack, and your target can hold up under real work.
That matters because “USB UART” covers two different situations. Some boards use FTDI, CP210x, or CH340 bridge chips and depend on vendor drivers or built-in OS support for those chipsets. Others present themselves as standard USB CDC devices and work with little or no extra setup. If you switch between dev boards, 3D printer controllers, routers, and small embedded targets, treat those as different classes of device from the start.
High baud rates are where the differences show up fast. A quality FTDI adapter may stay stable at rates that a bargain CH340 board struggles to hold. CP210x parts usually behave well, but driver behavior and host-side buffering still vary by operating system. The practical lesson is simple. The label on the module tells you less than a short test at your actual baud rate, cable length, and wiring layout.
What actually helps in real projects
- Test at the speed you plan to use: A port that works for a boot log can still fail during firmware upload or continuous telemetry.
- Keep wires short and clean: UART is forgiving, but long dupont leads and noisy power make errors show up sooner.
- Track adapters by chipset and serial number: This saves time when one board works on one machine and another does not.
- Match voltage levels before connecting anything: Many “driver problems” turn out to be 5V TX lines hitting 3.3V targets.
- Pick the right tool for the traffic: USB UART is great for shells, logs, recovery, and bring-up. Native USB is often the better choice for heavier data transfer or tighter timing.
I keep at least one known-good adapter from each major family on the bench: FTDI, CP210x, and CH340. That sounds excessive until a board only behaves with one chipset, or a customer machine accepts one driver cleanly and fights another. Having a second adapter turns guesswork into a quick A/B test.